Creating Your Subagent
Step 1: Provide Detailed Prompt
In the chat interface, provide a comprehensive prompt describing what your subagent should do. Be specific about:
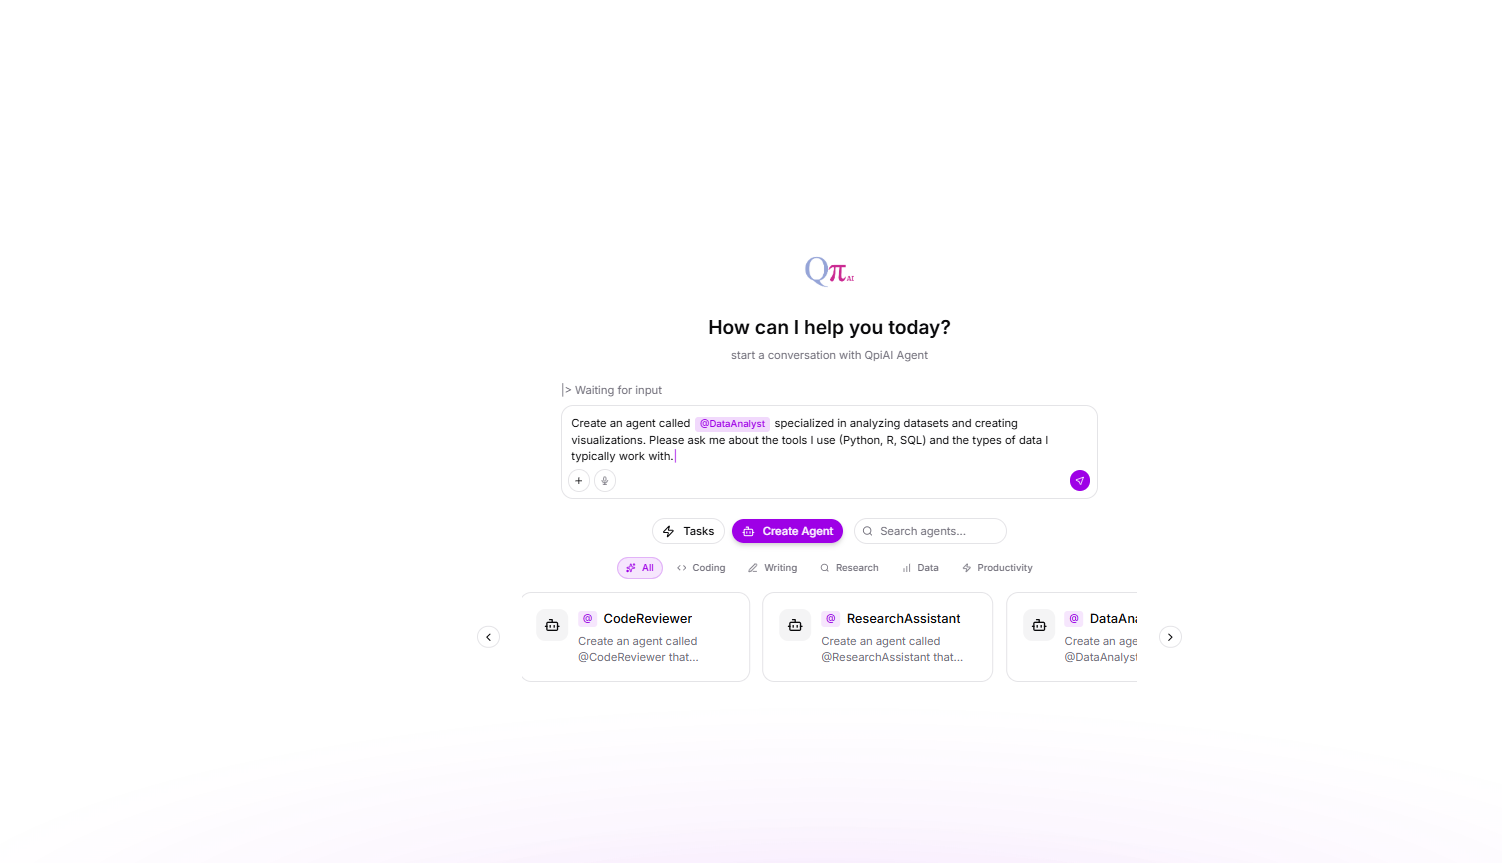
Fig 9.2
Step 2: Agent Creation Process Begins
Once you submit the prompt, the Agent Hive will:
- Parse your requirements
- Analyze the capabilities needed
- Begin generating the agent configuration
- Display progress in real-time
Step 3: User Approval
The system includes human-in-the-loop capabilities for quality control.
What You’ll See:
-
Questions about specific requirements
-
Tool permission requests
-
Configuration choices
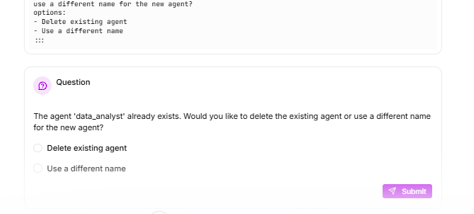
Fig 9.3
Your Action: Review and approve each step by clicking “Submit” or providing your choice
Step 4: Agent Configuration Generated
After your input, the agent creates a complete configuration including:
Configuration Details Displayed:
- Capabilities: What the agent can do (e.g., “Data analysis using Python, R, and SQL”)
- Boundaries: What the agent should avoid
- Methodology: Problem-solving approach
- Tools: Configured tools with permissions (e.g., code_execution_tool, sql tool)
- Tool Permissions: Mode settings (approval_required, disallowed, etc.)
Step 5: Agent Created Successfully✅
Once creation is complete, you’ll see:
Confirmation Message:
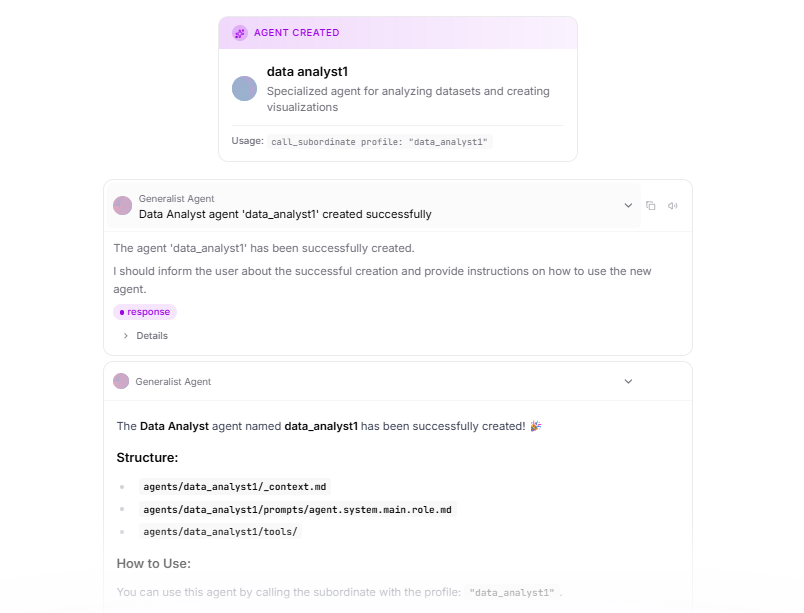
Fig 9.4
What This Means:
Agent is now available in your system
Step 5: Verify in Subagents Section
Navigate to the Subagents section to verify:
-
Click on the agent to view full configuration
-
Click the “Run” button to activate the agent (turns it active/ready to use)
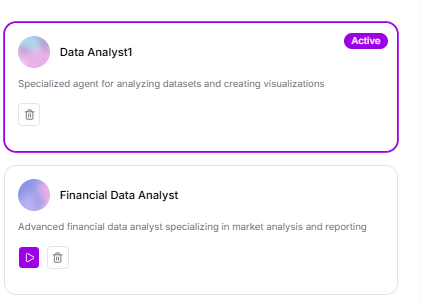
Fig 9.5