Creating a New Project
Step 1: Access Project Creation
- Navigate to the “Projects” section from the left sidebar menu
- Click the “New Project” button to open the project creation wizard
Step 2: Configure Basic Information
- Title: Enter a descriptive display name for your project
- Name (Folder Name): This auto-generates from the title using lowercase letters, numbers, and underscores (e.g., “Data Analytics” becomes “data_analytics”)
- Description: Provide a brief explanation of the project’s purpose
- Configure Memory Settings : Choose how memory should be handled
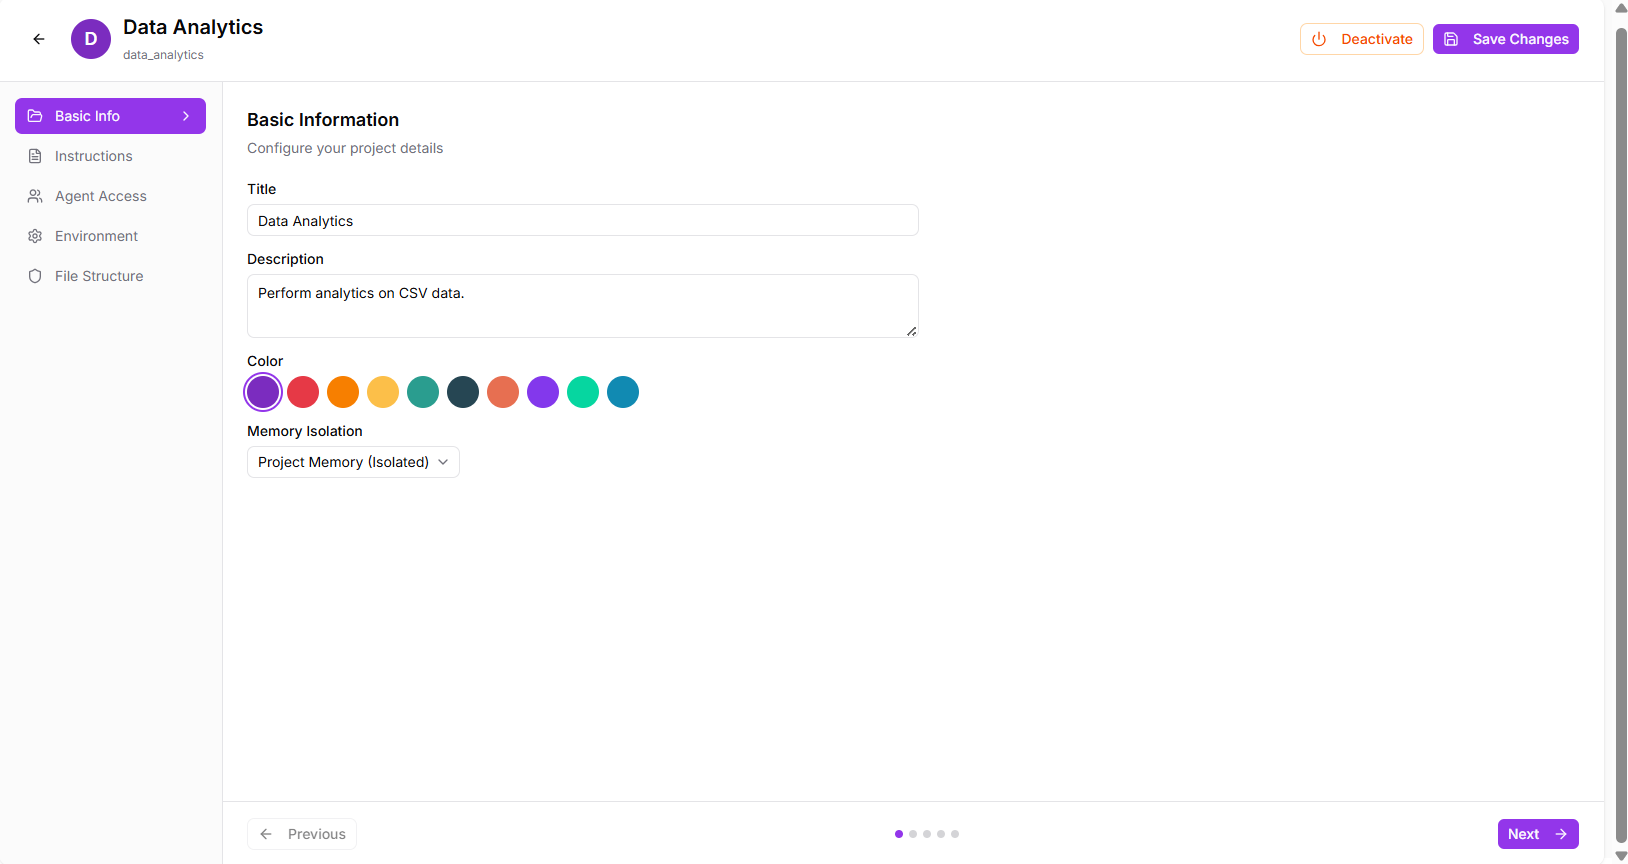
Fig: 3.1 Projects
Step 3: Set Project Instructions
- System Instructions (Optional): Add custom instructions that will be included in the agent’s system prompt when this project is active
- These instructions guide how the agent should behave specifically for this project
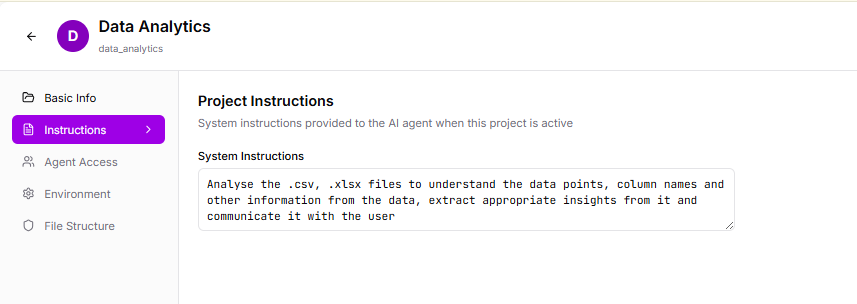
Fig 3.2
Step 4: Set Agent Access Control
- Restriction Mode: Choose who can work on this project
- Unrestricted: All agents can access this project
- Allowlist: Only selected agents from your list can work here
- Blocklist: All agents except selected ones can access the project
- Allowed/Blocked Agents: If using allowlist/blocklist, search and select specific agent profiles
- Allow Ephemeral Roles: Toggle to let the LLM create custom agent roles on-the-fly for this project

Fig: 3.3
Step 5: Configure Environment Variables
- Environment Variables: Add project-specific non-sensitive variables in KEY=value format (visible to agents)
- Secrets: Add sensitive credentials in KEY=value format
- These supplement global API keys with project-specific configurations
Step 6: Set File Structure Settings
- Inject File Structure: Toggle to include the project file tree in agent prompts (helps agents understand available files)
- Max Depth: Set how many directory levels deep to include (default: 5)
- Max Files: Limit the number of files to include (default: 20)
- Max Folders: Limit the number of folders to include (default: 20)
- Max Lines: Limit content preview lines per file (default: 250)
- Gitignore Rules: Specify patterns to exclude (like .git/, node_modules/, cache files, etc.)

Fig: 3.4
Step 7: Review and Create
- Click “Next” to navigate through all configuration screens
- Review your settings on the final screen
- Click “Create Project” or “Save Changes” to finalize
Step 8: Activate and Use
- Your new project appears in the project selector dropdown
- Select it to switch your workspace to this project
- All chats, files, and memories from this point forward will be project-specific
- Switch between projects anytime using the project selector
Last updated on