Create New Workflows
Follow these steps to create and configure automated workflows in Qpiai Agent Hive :
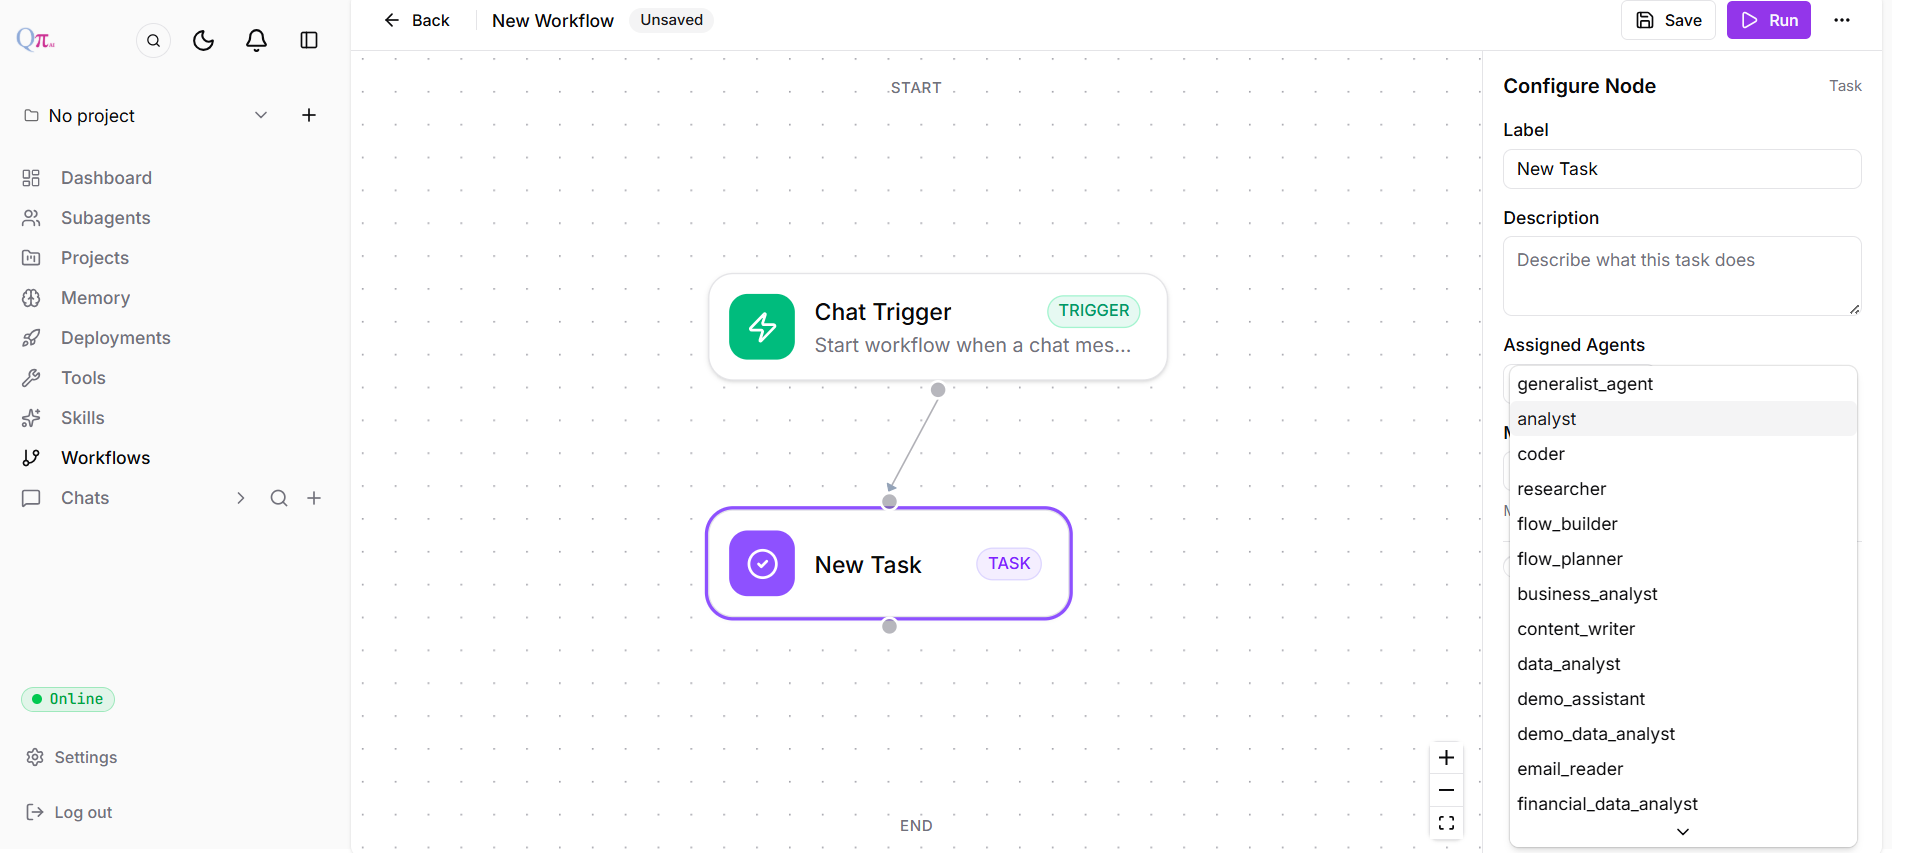
Fig 8.2
Step 1: Access Workflows Section
Navigate to the Workflows section from the left sidebar menu and click “New Workflow” or access the planner tool during a chat conversation to create workflows on-the-fly.
Step 2: Define Workflow Structure
Name Your Workflow
Provide a descriptive title for easy identification and future reference.
Add Task Items
Break down your automation into sequential or parallel steps.
- Examples: “Clean and validate”, “Generate report”
- Define individual tasks that make up your complete workflow
Set Dependencies
Configure which tasks must complete before others can begin, enabling conditional logic and branching paths through your workflow.
Step 3: Configure Trigger
Configure Node Settings:
- Enter a descriptive name and description .
- Trigger Type: Select from available trigger types:
-
Chat Message
-
Composio
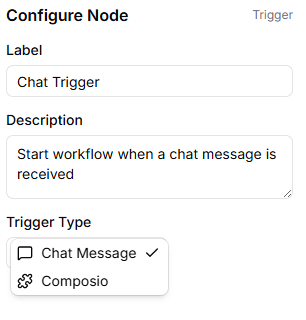
Fig 8.3
-
Step 4: Execute Workflow
Click the Run button to start the workflow. A prompt will appear requesting the necessary input to initiate execution. You can track progress in real time using visual indicators that show completed, in-progress, and pending tasks.
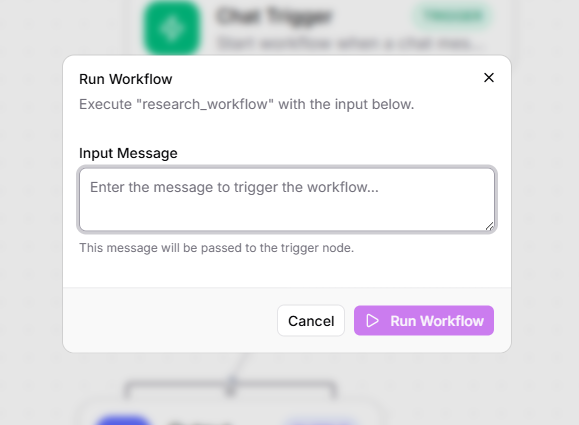
Fig 8.4