Creating new deployments
Follow these steps to create and configure a new deployment for your Agent/app:
Step 1: Navigate to the “Deployments Section”: In the sidebar, locate and click on the Deployment section,

Fig 5.3
Click on “ new deployment”
Step 2: Configure Settings
- Name your deployment - Provide a descriptive identifier
- Select agent profile - Choose which agent (default or specialized) to expose
- Set authentication - Configure API keys or tokens for secure access
- Define permissions - Specify which tools and capabilities are available through this deployment
- Choose Deployment Type Select your deployment protocol:
-
REST API - For HTTP-based integrations with external applications
-
MCP (Model Context Protocol) - For connecting tools and services via stdio, SSE, or HTTP transports
-
A2A (Agent-to-Agent) - For distributed multi-agent communication
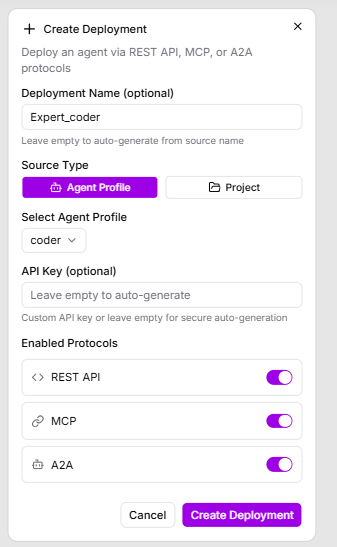
Fig 5.4
-
Step 3: Deploy and Test Click “Create Deployment” to activate. The deployment will appear in your deployments list with status indicators showing connection health(i.e, running,stopped ).

Fig 5.5
Test the deployment using the provided endpoint URLs or connection strings to ensure proper functionality.